Extensions are unique numbers assigned to users, devices, or agents in Nexbro IPBX. They help identify users within the system and ensure calls are routed to the correct destination. This guide explains how to create, edit, and manage extensions easily.
Step 1: Open the Extensions Page
1 .Log in to your system.
2. Navigate to Extensions from the main menu.
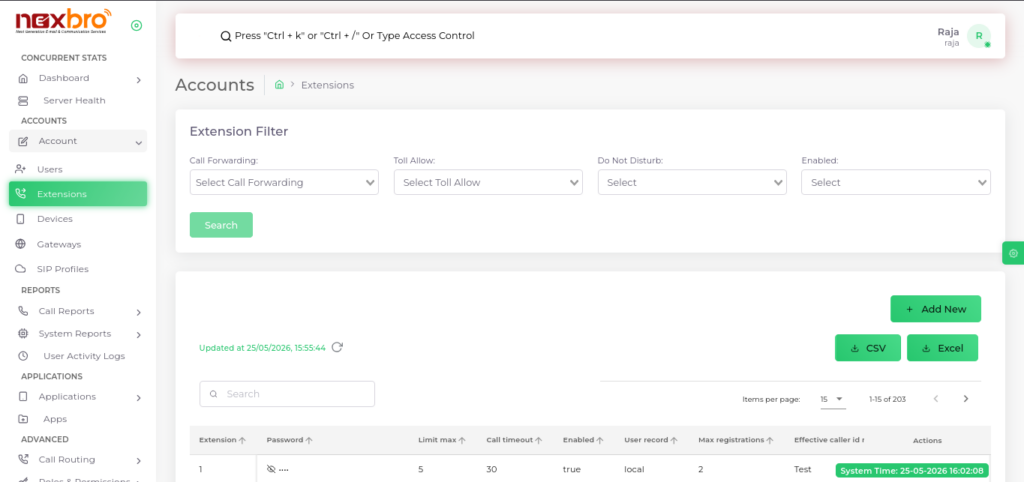
You will see a list of all existing extensions.
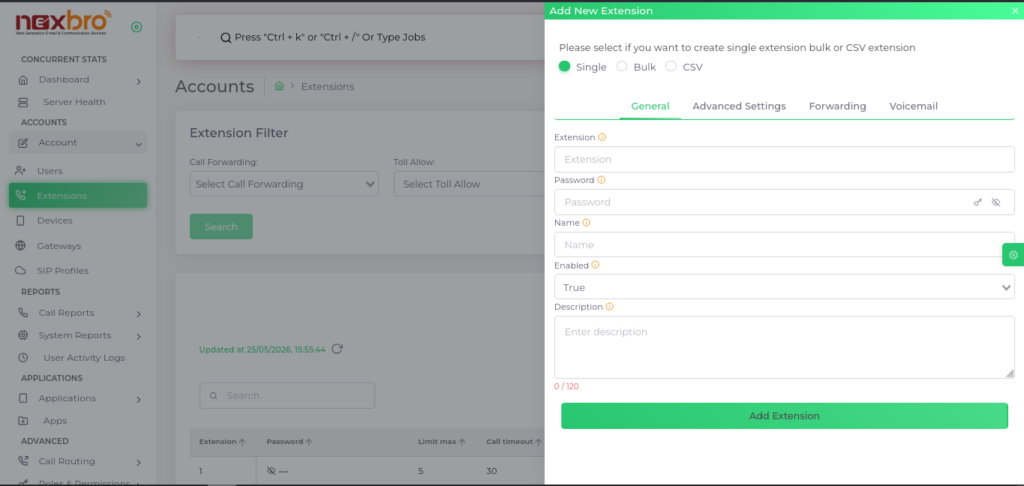
Step 2: Add a New Extension
1. Click “Add New” at the top of the extension list.
2. Fill in the required fields:
Step 3: Save Changes
Review all fields carefully.
Click Add Extension to apply changes.
| Field Name | Description |
| Extension | The extension is the SIP username. Please enter a numeric extension. The default configuration allows 1 to 8 digit extensions |
| Password | The password is the secret used for SIP authentication |
| Name | Please enter the name that will appear on the phone when a local call is made from this extension. |
| Enabled | Indicate whether the extension is enabled or disabled. Calling will not work when it is disabled. |
| Description | A description for the extension |
| Effective Caller id number | Please enter the number that will appear on the phone when a local call is made from this extension. |
| Outbound Caller id name | Please enter the name that will appear on the recipient’s phone when an outbound call is made from this extension. This feature only works if your calling service provider supports it. |
| Outbound Caller Id number | Choose the number that will appear on the recipient’s phone when an outbound call is made from this extension. Ensure that ‘Caller ID in From’ is enabled in gateway for this to work correctly. |
| Toll Allow | It allows you to limit who can make what type of calls. |
| Maximum Limit | Set the maximum number of outgoing calls for this extension. |
| Call timeout | Set the timeout for the call ringing |
| Maximum Registrations | Enter the maximum number of concurrent registrations allowed |
| User record | Determine whether to record local, inbound, outbound calls that were sent directly to this extension |
| Alert Application | Select the type of call events (missed calls, forwarded calls, voicemail) for which you want to receive alerts. |
| Emails | Specify the email address where call alerts should be sent. You can specify multiple emails here. |
| Call Group | Users within the same call group can answer or “pick up” incoming calls for other members in the group. This helps teams manage calls efficiently when someone is unavailable.You can specify call group in settings. |
| Directory First Name | Enter the first name so callers can find this extension in *411 by typing the first 3 letters. |
| Directory Last Name | Enter the last name so callers can search this extension in *411 using the first 3 letters. |
| Directory Visible | Enable or disable to hide it from directory results. |
| Directory Extension Visible | Enable or disable to announce the extension’s name before the call is connected. |
| Forward all calls destination | Set the destination where all calls will be forwarded when you activate the ‘Forward All Calls’ feature. |
| Forward busy destination | Define the destination for call forwarding when an extension is busy, such as when extension is already on another call. |
| Forward no answer destination | Specify the destination for call forwarding when there’s no answer. If extension don’t answer the call, it will be forwarded to this destination. |
| Forward user not registered destination | Set the destination for call forwarding when an extension is not registered or not connected to the network. |
| Do not disturb | Allows you to enable or disable the ‘Do Not Disturb’ mode for and extension, which disconnects incoming calls. |
| Hold Music | Select the music that will play for callers when this extension places them on hold. |
| Voicemail Password | Set a password to access voicemail messages. |
| Voicemail Recording Instructions | Play instructions before the caller leaves a recording. |
| Voicemail Recording Options | Play options after the caller finishes recording. |
| Voicemail Tutorial | Play a voicemail tutorial after the next login. |
| Voicemail Enabled | Enable or disable this voicemail. |
| Voicemail Audio Greeting | You can upload your custom voicemail greeting, otherwise the default greeting will be used. |
| Voicemail Description | Add a description for this voicemail box. |
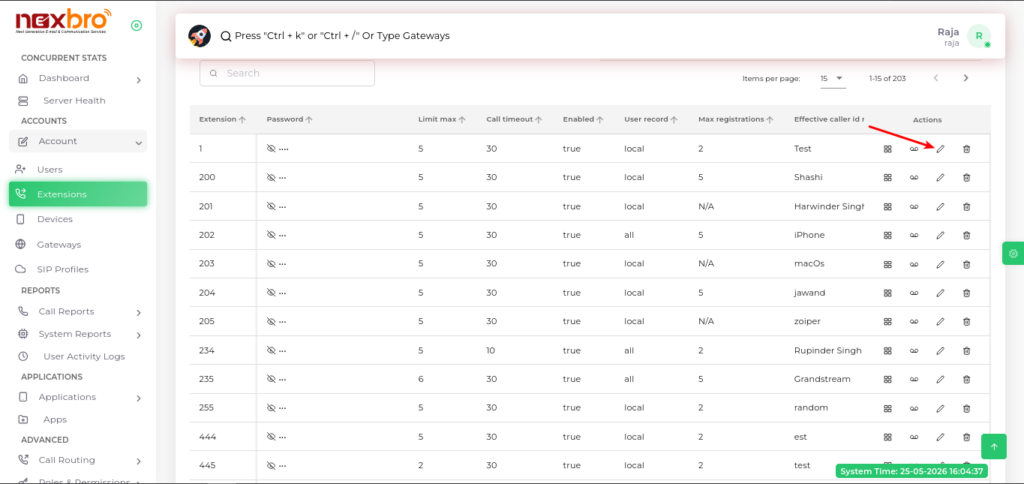
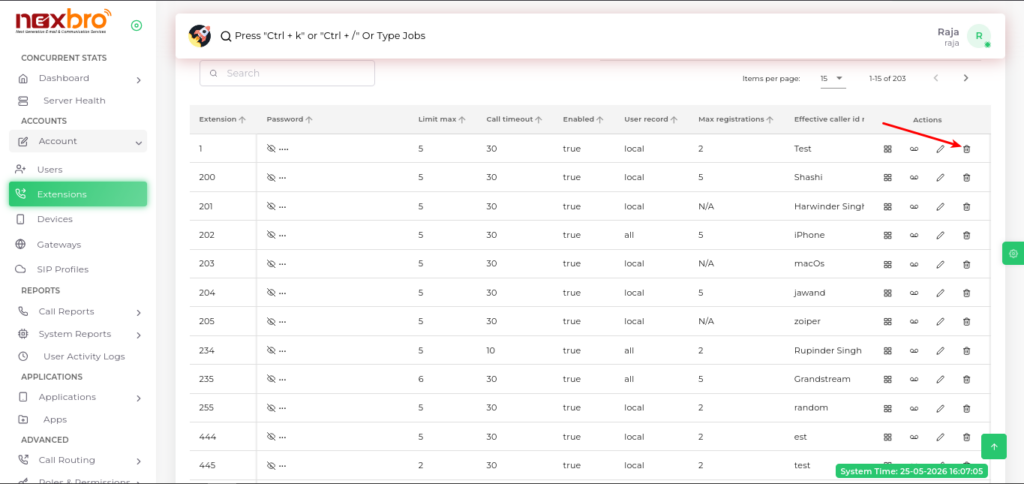
Step 4: Manage Extensions
Edit: Modify extension details via the edit icon.
Delete: Remove an extension via the delete icon.
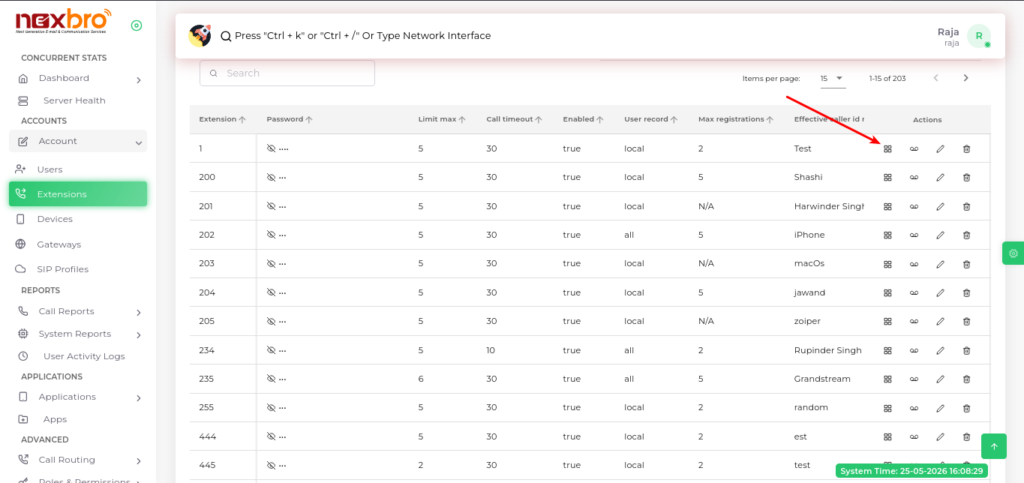
How to Generate a QR code for instant login to the Nexbro mobile application.
- Click on QR Code Icon.
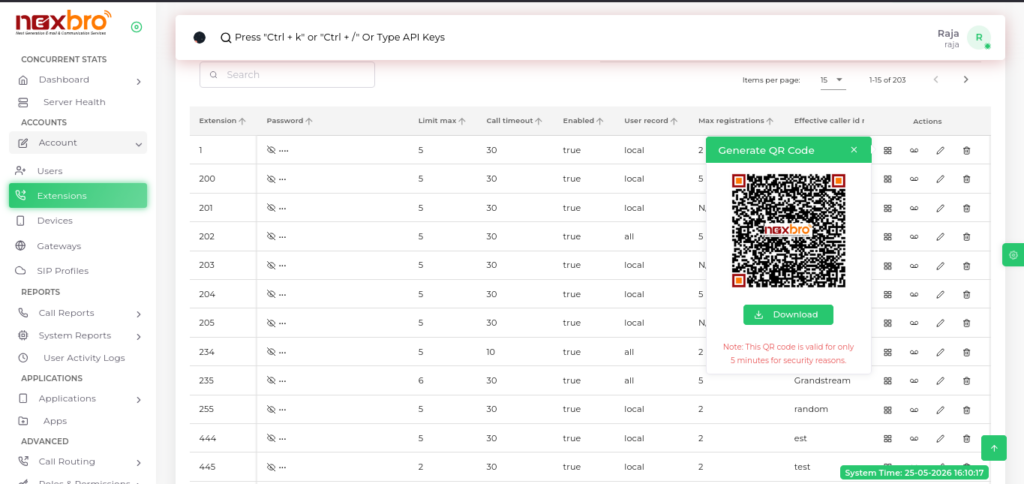
- Then you get this page.
- Then Enter your admin Password.
After that you will QR Code.
How to Create multiple extensions at once by defining a range.
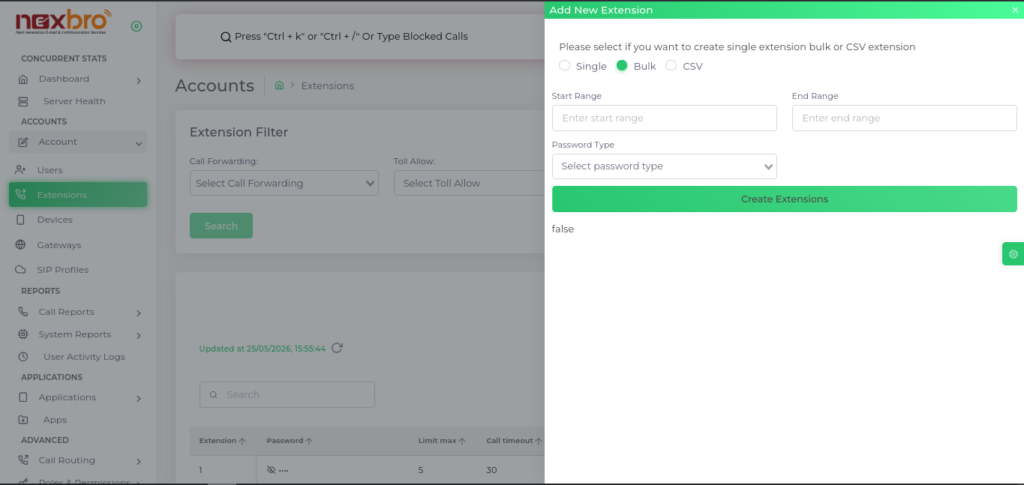
Create multiple extensions at once by defining a range
Fields include:
- Start Range – Starting extension number
- End Range – Ending extension number
- Password Type – Same as Extension – Password will match the extension number
- Password Type – Random – System generates a random password
- Click “Generate Extensions” to create multiple extensions in one go.
Upload a CSV file to create multiple extensions

Steps:
- Click on “CSV” option
- Use “Click here to download sample file” to get the correct format
- Upload the filled CSV file
- System will create extensions based on the uploaded data
Export Options
The admin can export extension data using:
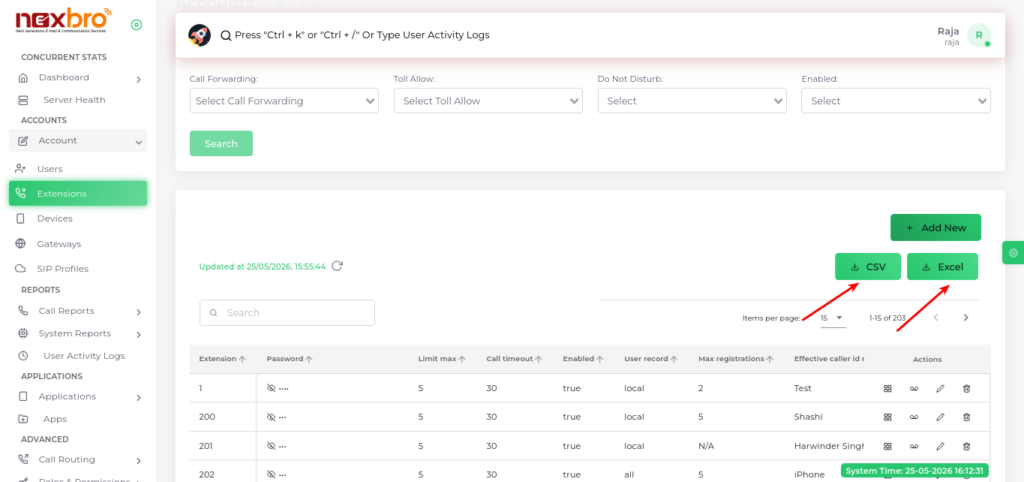
- CSV Export – Downloads extension details in CSV format.
- Excel Export – Downloads extension details in Excel format.
These options help in reporting, backup, or bulk management purposes.